Yoga For Tight Hamstrings
Jan 26, 2021
Yoga For Tight Hamstrings
Tight Hamstrings are not only uncomfortable, but they can cause a merit of other problems like back pain and knee pain.
If left unaddressed, the lack of mobility can turn into poor posture, cause more back pain and pull your hips out of natural alignment.
So what causes tight hamstrings anyway?
- Sitting at a desk for an extended period of time
- Tight Hip Flexors (Link to hip flexor blog)
- Weakness from underuse
- Injury
Luckily, there are several different yoga poses to help with tight hamstrings. These gentle hamstring stretches are accessible no matter if you’re a beginner or intermediate yoga student.
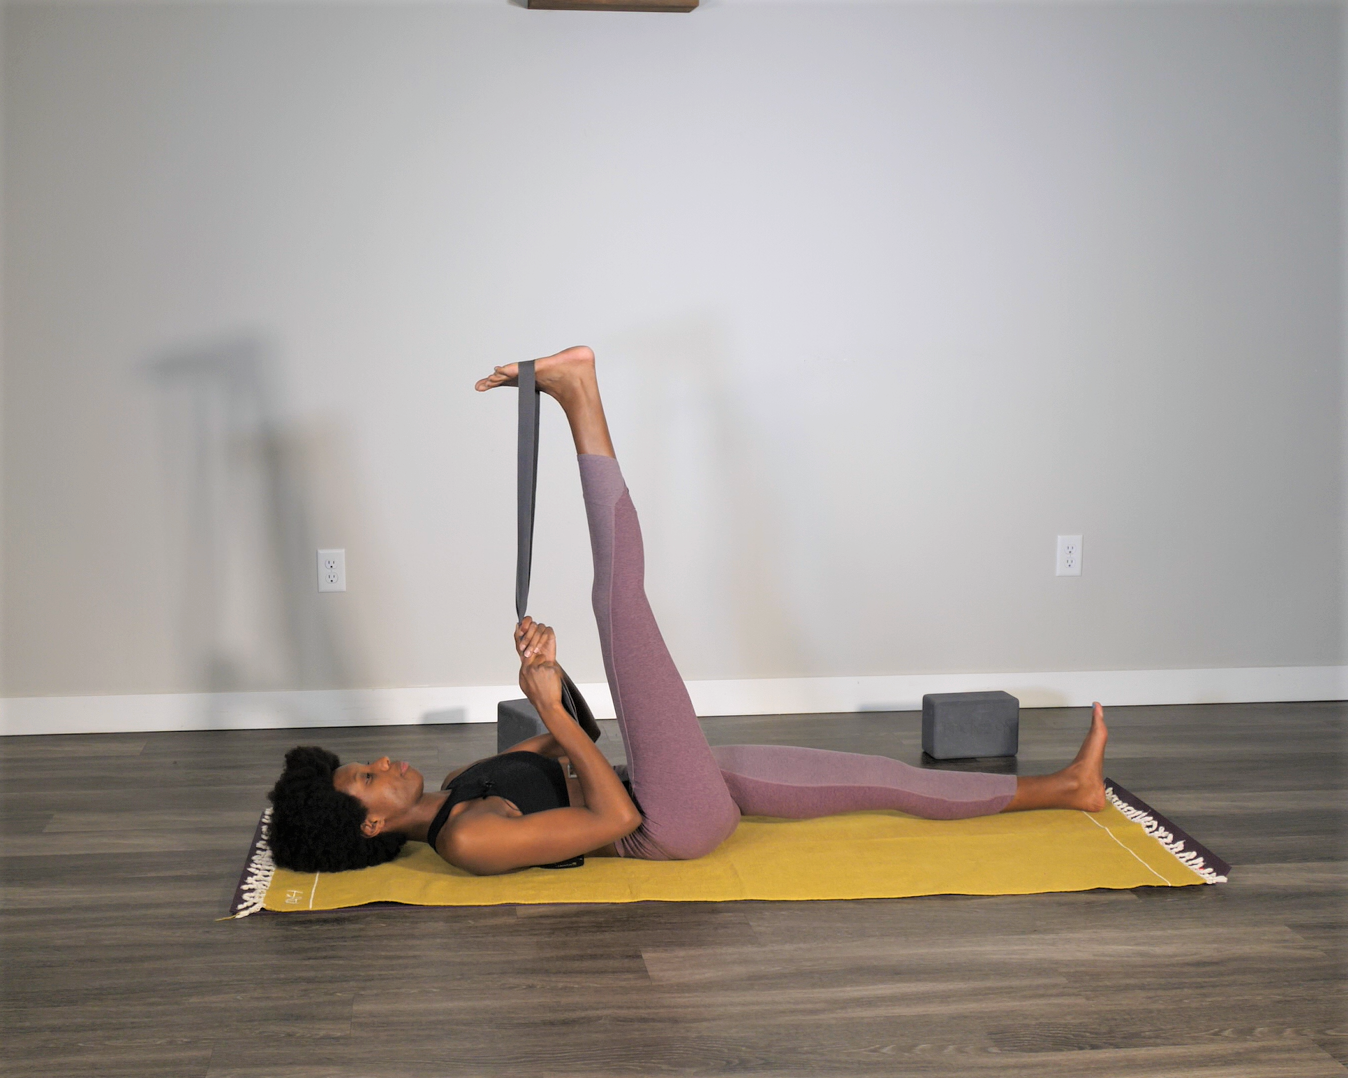
1. Supta Padangusthasana / Supine Hamstring Stretch

- Lay on your back with your legs outstretched.
- Bend your right knee and place a yoga strap around the ball of your right foot.
- Hold the ends of the strap with each hand.
- Flex your foot and straighten your right leg up toward the ceiling while holding tightly to the strap.
- Keep your left foot and hips grounded onto the floor.
- Alternate between flexed foot and pointed toe to access different stretches.
- Switch Sides
2. Janu Sirsasana / head-to-knee pose

- Stretch both legs out in front of you.
- Bend your right knee and place the sole of your foot near your left inner thigh
- Reach out and grab your extended foot.
- Place a strap around the ball of your foot if needed.
- Turn your torso toward your left leg.
- Straighten your back by pulling your shoulder blades down towards the ground.
- While keeping your back straight, begin to lean forward and reach your chest towards your knee.
- Switch sides.
3. Seated Forward Fold
- Stretch both legs out in front of you.
- Reach out and grab both feet or place a strap around the ball of your feet if needed.
- Straighten your back by pulling your shoulder blades down towards the ground.
- While keeping your back straight, bend forward and reach your chest towards your knee.
- Switch Sides
4. Pyramid Pose

- Stand at the top of your mat and step your right foot out about 3 - 4 feet distance.
- Point your right foot straight forward and point your left foot at a 45-degree angle.
- Draw a straight line from heel to heel and make sure that both heels are in line with each other.
- Square your torso toward the right foot and align your chest, shoulders, and ribs with the edge of your mat.
- Grab opposite elbows behind your back
- Straighten your back by pulling your shoulder blades down towards the ground.
- While keeping your back straight, bend forward and reach your chest towards your knee.
- If you need balance, place your hands on the side of the front foot, either on the ground or on blocks.
- Switch Sides
5. Triangle Pose

- Stand at the top of your mat and step your right foot out about 3 - 4 feet distance.
- Point the right toes straight forward and allow the left toes to turn parallel to the short sides of your mat.
- Keep your hips open. You do not square your torso in this pose.
- Bring both arms out to a “T”
- Straighten your back by pulling your shoulder blades down towards the ground.
- While keeping your back straight, hinge forward and reach your right hand towards your right shin, ankle or big toe.
- Look up at the ceiling and stack your left shoulder over your right by pretending you are being pressed between two panes of glass.
- Switch Sides
FREE 5-Day Anxiety Relief Challenge
The 5-day Anxiety Relief Challenge is Yoga’s take on stress management. The best part? You won't even need to roll out your yoga mat. All exercises are a practical way to use yoga philosophy off the mat and in your busy life.
We hate SPAM. We will never sell your information, for any reason.

